-
[Django] 웹 소켓 공부 log프로그래밍/Django & Flask 2020. 12. 1. 14:13반응형
쪽지 기능을 구현하려고 찾아보던 중 Websocket에 대해 알게되어 정리해보고자 한다.
웹소켓 Websocket
기존 웹 페이지의 브라우저 통신 및 렌더링 방식 - Http 요청 및 응답을 사용한 방식
- 브라우저를 새로고침하여 전체를 렌더링해서 클라이언트
브라우저에 표현한다.
- 요청이 있어야만 응답을 준다.비동기 통신 발달 - 원하는 부분만 실시간으로 상호 데이터를 교환하여 새로고침
없이 렌더링 (Ajax)웹소켓 WebSocket 등장 - 클라이언트 브라우저와 웹 서버 사이에서 양방향 메세지
송수신 기술
- 양방향 모두 언제든지 요청 가능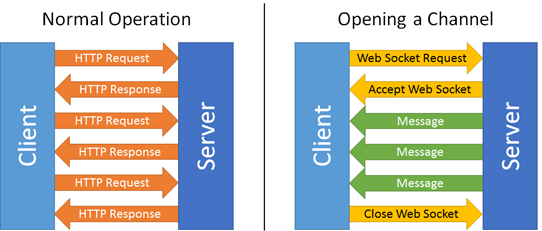
Ajax Polling vs WebSocekt * Polling - 클라이언트에서 일정시간마다 요청을 보내고, 서버는 현재상태를 응답하는 방식
서버에 별 다른 변화가 없어도 응답하기 때문에 불필요한 트래픽이 발생함.
Channels
파이썬에도 websocket 모듈이 있다.
# 콘솔창에서 실행
pip install websocket
하지만 Django에서 쓰기가 쉽지 않다. 장고는 요청이 들어오면 응답하고, 다음 요청을 기다리는 방식이기 때문이다. 이를 원활하게 해주는 Tornado(비동기(Asynchronous) 통신을 지원하는 Python 웹프레임워크)가 존재하지만 장고에선 그보다 더 쉽게 접근할 수 있는 'Channels'가 존재한다!
Channels is a project that takes Django and extends its abilities beyond HTTP -
to handle WebSockets, chat protocols, IoT protocols, and more. It’s built on a Python specification called ASGI.
*ASGI : web server와 django, 애플리케이션을 연결 해주는 Python의 표준 API
Cunsumer
장고에서 Http 요청을 받을 때, URLconf를 통해 view를 찾아가는 것과 비슷하게, Channels가 웹소켓 연결을 받아들일 때, routing configuration을 통해 consumer를 찾는다. 연결로부터 오는 이벤트를 다루기 위해 consumer에 있는 다양한 기능들을 호출한다.
Django Channels URLconf Routing configuration views consumer Channel Layer
communication 시스템의 한 종류. 여러 사람이 소통하는 것을 가능하게 해준다. channel layer는 두가지 abstractions을 제공한다.
- channel: 메세지를 보낼 수 있는 메일박스. 각각의 채널은 이름을 갖는다. 채널의 이름을 가진 누구든지 channel에 메세지를 보낼 수 있다.
- group: 연관된 채널의 그룹을 의미한다. 그룹 또한 이름을 가진다. 그룹의 이름을 가진 누구든지 그룹에 채널을 삭제/추가 할 수 있다.
모든 consumer instance는 자동적으로 채널 이름이 만들어진다. 그리고 channel layer를 통하여 소통할 수 있다.
문서에 chat을 만드는 간단한 project guide가 있길래 channel도 배워볼겸 따라해보기로 함!
channels.readthedocs.io/en/stable/tutorial/part_1.html
Tutorial Part 1: Basic Setup — Channels 3.0.2 documentation
In this tutorial we will build a simple chat server. It will have two pages: The room view will use a WebSocket to communicate with the Django server and listen for any messages that are posted. We assume that you are familiar with basic concepts for build
channels.readthedocs.io
Basic 1단계
더보기1) 세팅
# channels install
pip install channels# 프로젝트이름/settings.py
# channels 추가
INSTALLED_APPS = [
    'django.contrib.admin',
    'django.contrib.auth',
    'django.contrib.contenttypes',
    'django.contrib.sessions',
    'django.contrib.messages',
    'django.contrib.staticfiles',
#####
    'channels', # 채널
]
# 프로젝트이름/asgi.py
import os

from channels.routing import ProtocolTypeRouter
from django.core.asgi import get_asgi_application

os.environ.setdefault('DJANGO_SETTINGS_MODULE', '프로젝트이름.settings')

application = ProtocolTypeRouter({
    "http" : get_asgi_application(),
})
#프로젝트이름/settings.py
ASGI_APPLICATION = '프로젝트이름.asgi.application'2) Chat App 생성 및 셋팅
# chat이라는 이름의 app 추가
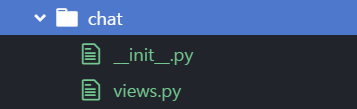
python manage.py startapp chat# 폴더 셋팅
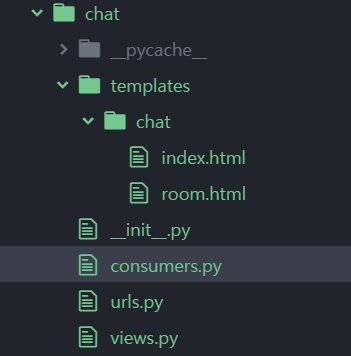
__init__.py와 views.py 파일만 사용할 것이기 때문에 이외의 파일은 모두 삭제
셋팅 완. # setting.py에 chat 추가
INSTALLED_APPS = [
    'django.contrib.admin',
    'django.contrib.auth',
    'django.contrib.contenttypes',
    'django.contrib.sessions',
    'django.contrib.messages',
    'django.contrib.staticfiles',
     #....
    'channels', # 채널
    'chat', #실습
]
# chat app에 templates 폴더 추가하고 index.html 생성
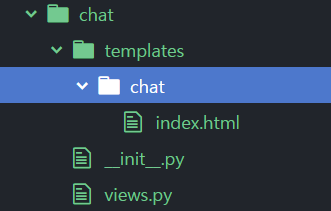
# index.html에 다음 코드 복붙해주기
<!-- chat/templates/chat/index.html -->
<!DOCTYPE html>
<html>
<head>
    <meta charset="utf-8"/>
    <title>Chat Rooms</title>
</head>
<body>
    What chat room would you like to enter?<br>
    <input id="room-name-input" type="text" size="100"><br>
    <input id="room-name-submit" type="button" value="Enter">

    <script>
        document.querySelector('#room-name-input').focus();
        document.querySelector('#room-name-input').onkeyup = function(e) {
            if (e.keyCode === 13) {  // enter, return
                document.querySelector('#room-name-submit').click();
            }
        };

        document.querySelector('#room-name-submit').onclick = function(e) {
            var roomName = document.querySelector('#room-name-input').value;
            window.location.pathname = '/chat/' + roomName + '/';
        };
    </script>
</body>
</html>
# chat/views.py 수정
from django.shortcuts import render

def index(request):
    return render(request, 'chat/index.html')
#chat에 urls.py 추가
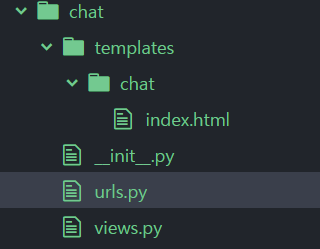
#chat/urls.py
from django.urls import path

from . import views

urlpatterns = [
    path('', views.index, name='index'),
]
#프로젝트이름/urls.py
경로 추가!
urlpatterns = [
    #....
    path('chat/', include('chat.urls')),
]
3) 서버 연결
python manage.py runserver
서버를 연결했을 때 위와 같은 문장(Starting ASGI/Channels~)가 뜨면 연결이 잘 됐다는 것이다.
그 다음 본인의 서버 주소/chat에 들어간다.
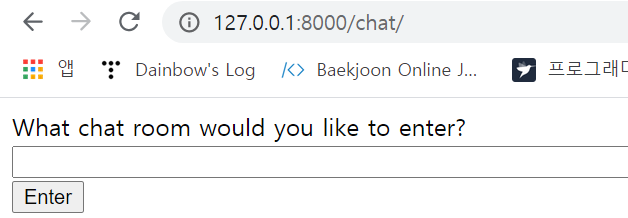
그러면 다음과 같은 페이지가 렌더링 될 것이다!
아무거나 입력해준뒤
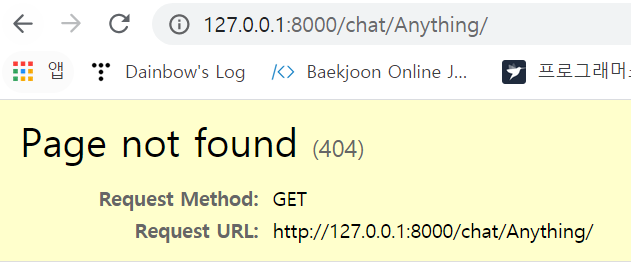
다음 페이지가 나오면 일단 basic 1단계 끝!
Basic 2단계
더보기# templates에 room.html 추가
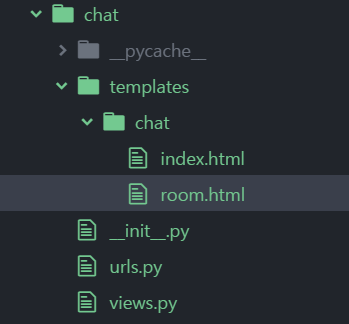
다음과 같은 모습 #chat/room.html
밑에 코드를 복사해서 붙여넣어준다.
<!-- chat/templates/chat/room.html -->
<!DOCTYPE html>
<html>
<head>
    <meta charset="utf-8"/>
    <title>Chat Room</title>
</head>
<body>
    <textarea id="chat-log" cols="100" rows="20"></textarea><br>
    <input id="chat-message-input" type="text" size="100"><br>
    <input id="chat-message-submit" type="button" value="Send">
    {{ room_name|json_script:"room-name" }}
    <script>
        const roomName = JSON.parse(document.getElementById('room-name').textContent);

        const chatSocket = new WebSocket(
            'ws://'
            + window.location.host
            + '/ws/chat/'
            + roomName
            + '/'
        );

        chatSocket.onmessage = function(e) {
            const data = JSON.parse(e.data);
            document.querySelector('#chat-log').value += (data.message + '\n');
        };

        chatSocket.onclose = function(e) {
            console.error('Chat socket closed unexpectedly');
        };

        document.querySelector('#chat-message-input').focus();
        document.querySelector('#chat-message-input').onkeyup = function(e) {
            if (e.keyCode === 13) {  // enter, return
                document.querySelector('#chat-message-submit').click();
            }
        };

        document.querySelector('#chat-message-submit').onclick = function(e) {
            const messageInputDom = document.querySelector('#chat-message-input');
            const message = messageInputDom.value;
            chatSocket.send(JSON.stringify({
                'message': message
            }));
            messageInputDom.value = '';
        };
    </script>
</body>
</html>
#chat/views.py
# 코드 추가
def room(request, room_name):
    return render(request, 'chat/room.html', {
        'room_name': room_name
    })
#chat/urls.py
#경로 추가
path('<str:room_name>/', views.room, name='room'),
# runserver
python manage.py runserver서버를 실행한 후 1단계에서 입력한 주소에 들어가보면 다음과 같은 화면이 나온다! 하지만 아직 채팅이 불가능한 상태이다. view에서 지정한 room은 웹소켓을 열려고 시도하지만 우리는 아직 웹소켓 연결을 받아들이는 consumer를 만들지 않았기 때문이다.
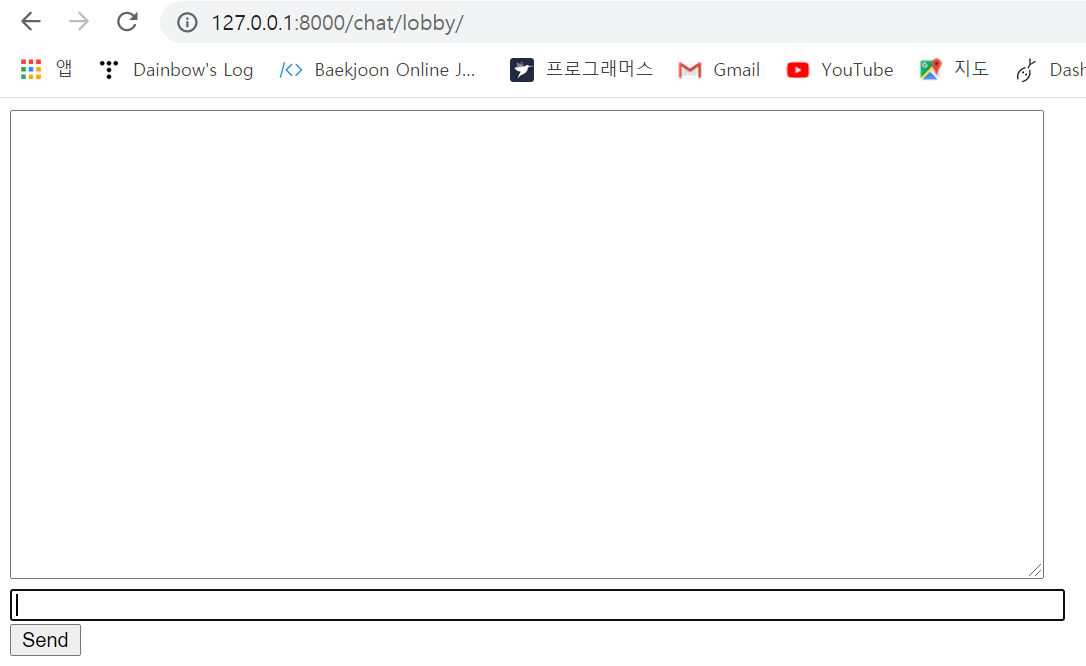
채팅창 생성 이제 기본적인 consumer를 만들 것이다.
# chat/consumers.py 생성
밑의 코드를 복붙해서 넣어준다.
# chat/consumers.py
import json
from channels.generic.websocket import WebsocketConsumer

class ChatConsumer(WebsocketConsumer):
    def connect(self):
        self.accept()

    def disconnect(self, close_code):
        pass

    def receive(self, text_data):
        text_data_json = json.loads(text_data)
        message = text_data_json['message']

        self.send(text_data=json.dumps({
            'message': message
        }))
#chat/routing.py
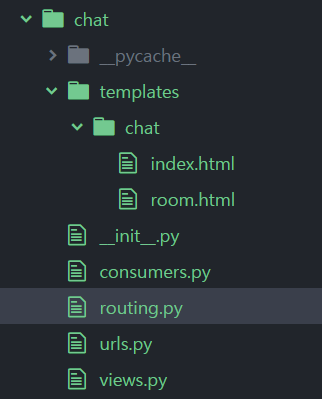
routing.py 추가 역시 복붙해서 넣어준다.
from django.urls import re_path

from . import consumers

websocket_urlpatterns = [
    re_path(r'ws/chat/(?P<room_name>\w+)/$', consumers.ChatConsumer.as_asgi()),
]
* as__asgi()는 장고의 as_view()와 같은 역할을 한다
# 프로젝트이름/asgi.py
asgi.py 파일을 다음과 같이 수정해준다.
import os

from channels.auth import AuthMiddlewareStack #추가
from channels.routing import ProtocolTypeRouter, URLRouter #URLRouter 추가
from django.core.asgi import get_asgi_application
import chat.routing # chat import

os.environ.setdefault("DJANGO_SETTINGS_MODULE", "mysite.settings")

application = ProtocolTypeRouter({
  "http": get_asgi_application(),
  "websocket": AuthMiddlewareStack( # 추가
        URLRouter(
            chat.routing.websocket_urlpatterns
        )
    ),
})
Channels development server에 connetion이 만들어지면,
1) ProtocolTypeRouter가 어떤 종류의 connection인지 판단한다.
2) 그것이 웹소켓 connection이면 (ws:// or wss://), Connection은 AuthMiddlewareStack에 주어진다.
3) AuthMiddlewareStack은 connection의 socope를 최근의 authenticated 유저와 함께 populate한다
4) 그 후 connection은 URLRouter로 넘어간다.
5) URLRouter는 특정한 consumer에게 그것을 route하기 위해 connection의 HTTP 경로를 examine한다.
# runserver
다시 server를 시행하고, http://127.0.0.1:8000/chat/lobby/로 이동해서 채팅을 입력하면 화면에 글자가 나올 것이다. 하지만 똑같은 경로로 두번째 웹사이트를 띄워놓고 입력하면 첫번째 웹사이트에선 나타나지 않는다. 이를 다루기 위해선 같은 ChatConsumer가 multiple instance를 가져야 한다. Channels는 consumer 사이에 이러한 커뮤니케이션이 가능하게 하도록 하기 위해 channel layer가 존재한다.
우리는 같은 방안에 존재하는 사람들이 서로 채팅하기를 원한다. 이걸 위해서 같은 방 이름을 기반으로 한 group에 채널을 더해야 한다. 이것은 채팅방안에 있는 사람들이 다른 사람에게 채팅 보내는게 가능해진다.
# 채널 레이어 구현
채널 레이어를 구현하기 위해선 redis를 설치해줘야 한다. (github.com/tporadowski/redis/releases)
pip install channel-redis#프로젝트이름/settings.py
다음 내용을 추가한다.
ASGI_APPLICATION = 'mysite.asgi.application'
CHANNEL_LAYERS = {
    'default': {
        'BACKEND': 'channels_redis.core.RedisChannelLayer',
        'CONFIG': {
            "hosts": [('127.0.0.1', 6379)],
        },
    },
}
* 다양한 채널 레이어를 갖게 해주지만, 대부분의 프로젝트가 'default' 채널 레이어만을 사용해야 할 것이다.
이제 레디스와 함께 채널 레이어가 소통할 수 있게 해보자. 장고 쉘을 열어 다음 명령을 입력해준다.
# python3 manage.py shell
>>> import channels.layers
>>> channel_layer = channels.layers.get_channel_layer()
>>> from asgiref.sync import async_to_sync
>>> async_to_sync(channel_layer.send)('test_channel', {'type': 'hello'})
>>> async_to_sync(channel_layer.receive)('test_channel')
{'type': 'hello'}
이제 우리는 채널 레이어를 가졌다. 채널레이어를 ChatConsumer에 사용해보자.
다음 코드를 chat/consumers.py에 새로 집어넣는다.
# chat/consumers.py
import json
from asgiref.sync import async_to_sync
from channels.generic.websocket import WebsocketConsumer

class ChatConsumer(WebsocketConsumer):
    def connect(self):
        self.room_name = self.scope['url_route']['kwargs']['room_name']
        self.room_group_name = 'chat_%s' % self.room_name

        # Join room group
        async_to_sync(self.channel_layer.group_add)(
            self.room_group_name,
            self.channel_name
        )

        self.accept()

    def disconnect(self, close_code):
        # Leave room group
        async_to_sync(self.channel_layer.group_discard)(
            self.room_group_name,
            self.channel_name
        )

    # Receive message from WebSocket
    def receive(self, text_data):
        text_data_json = json.loads(text_data)
        message = text_data_json['message']

        # Send message to room group
        async_to_sync(self.channel_layer.group_send)(
            self.room_group_name,
            {
                'type': 'chat_message',
                'message': message
            }
        )

    # Receive message from room group
    def chat_message(self, event):
        message = event['message']

        # Send message to WebSocket
        self.send(text_data=json.dumps({
            'message': message
        }))
유저가 메세지를 전송할 때, 자바스크립트 기능은 웹소켓을 넘어 ChatConsumer로 메세지를 전달한다. ChatConsumer는 그 메세지를 받고, 방 이름과 일치하는 그룹을 찾을 것이다. 같은 방 내 모든 ChatConsumer는 메세지를 받을 것이다.
* ChatConsumer의 부분별 설명
self.scope['url_route']['kwargs']['room_name']URL 루트에서 '방 이름'을 습득한다. = consumer에게 웹소켓 연결을 열어준다. 모든 consumer는 연결에 관한 정보를 포함하는 scope를 가진다.
self.room_group_name = 'chat_%s' % self.room_name사용자가 지은 방 이름으로부터 그룹을 만든다.
async_to_sync(self.channel_layer.group_add)(...)그룹에 join한다.
self.accept()웹소켓 연결을 받아들인다. 만약 accept를 부르지 않는다면, 연결은 거절될 것이다. 요청한 유저가 인증받지 않은 경우 등 거절할 수 있다. accept()는 마지막에 실행하는 걸 추천한다.
async_to_sync(self.channel_layer.group_discard)(...)그룹을 떠난다.
async_to_sync(self.channel_layer.group_send)그룹에 event를 보낸다.
이제 runserver를 시행하고 창을 두 개를 켠다.
두번째 창에서 채팅을 입력했을 때 첫번째 창에서 받을 수 있다!
Basic 3단계
더보기ChatConsumer는 현재 synchonous다. Synchronous consumer는 그들은 정기적으로 입출력을 수행하기 때문에 편리하다. 그러나 asychronous consumer는 그보다 더 높은 수행레벨을 제공한다.
ChatConsumer를 async하게 만들기 위해 다시 써보자!
#chat/consumers.py
# chat/consumers.py
import json
from channels.generic.websocket import AsyncWebsocketConsumer

class ChatConsumer(AsyncWebsocketConsumer):
    async def connect(self):
        self.room_name = self.scope['url_route']['kwargs']['room_name']
        self.room_group_name = 'chat_%s' % self.room_name

        # Join room group
        await self.channel_layer.group_add(
            self.room_group_name,
            self.channel_name
        )

        await self.accept()

    async def disconnect(self, close_code):
        # Leave room group
        await self.channel_layer.group_discard(
            self.room_group_name,
            self.channel_name
        )

    # Receive message from WebSocket
    async def receive(self, text_data):
        text_data_json = json.loads(text_data)
        message = text_data_json['message']

        # Send message to room group
        await self.channel_layer.group_send(
            self.room_group_name,
            {
                'type': 'chat_message',
                'message': message
            }
        )

    # Receive message from room group
    async def chat_message(self, event):
        message = event['message']

        # Send message to WebSocket
        await self.send(text_data=json.dumps({
            'message': message
        }))
* 이전 코드와의 차이점
- Chatconsumer가 Websocketconsumer가 아닌 AsyncWebsocketConsumer를 상속받음
- 모든 methods는 def가 아닌 async def로 선언됨
- await는 async 기능을 부를 때 사용되어 짐
- async_to_sync는 더이상 필요되어지지 않는다.
이제 runserver를 수행해보자!
반응형'프로그래밍 > Django & Flask' 카테고리의 다른 글
[🛸 Flask] Flask Blueprint (0) 2021.01.16 [Django] debug=False로 수정하니 static, media 파일 날라감 (0) 2020.12.11 [Django] ImportError: cannot import name 'Class' from 'app.models' (클래스 간 circular dependency) (0) 2020.11.30 [Django] 🤔 a 태그를 이용한 검색기능 구현중..... (0) 2020.11.30 [Django] 태그 검색🔎기능 만들기 (0) 2020.11.28